
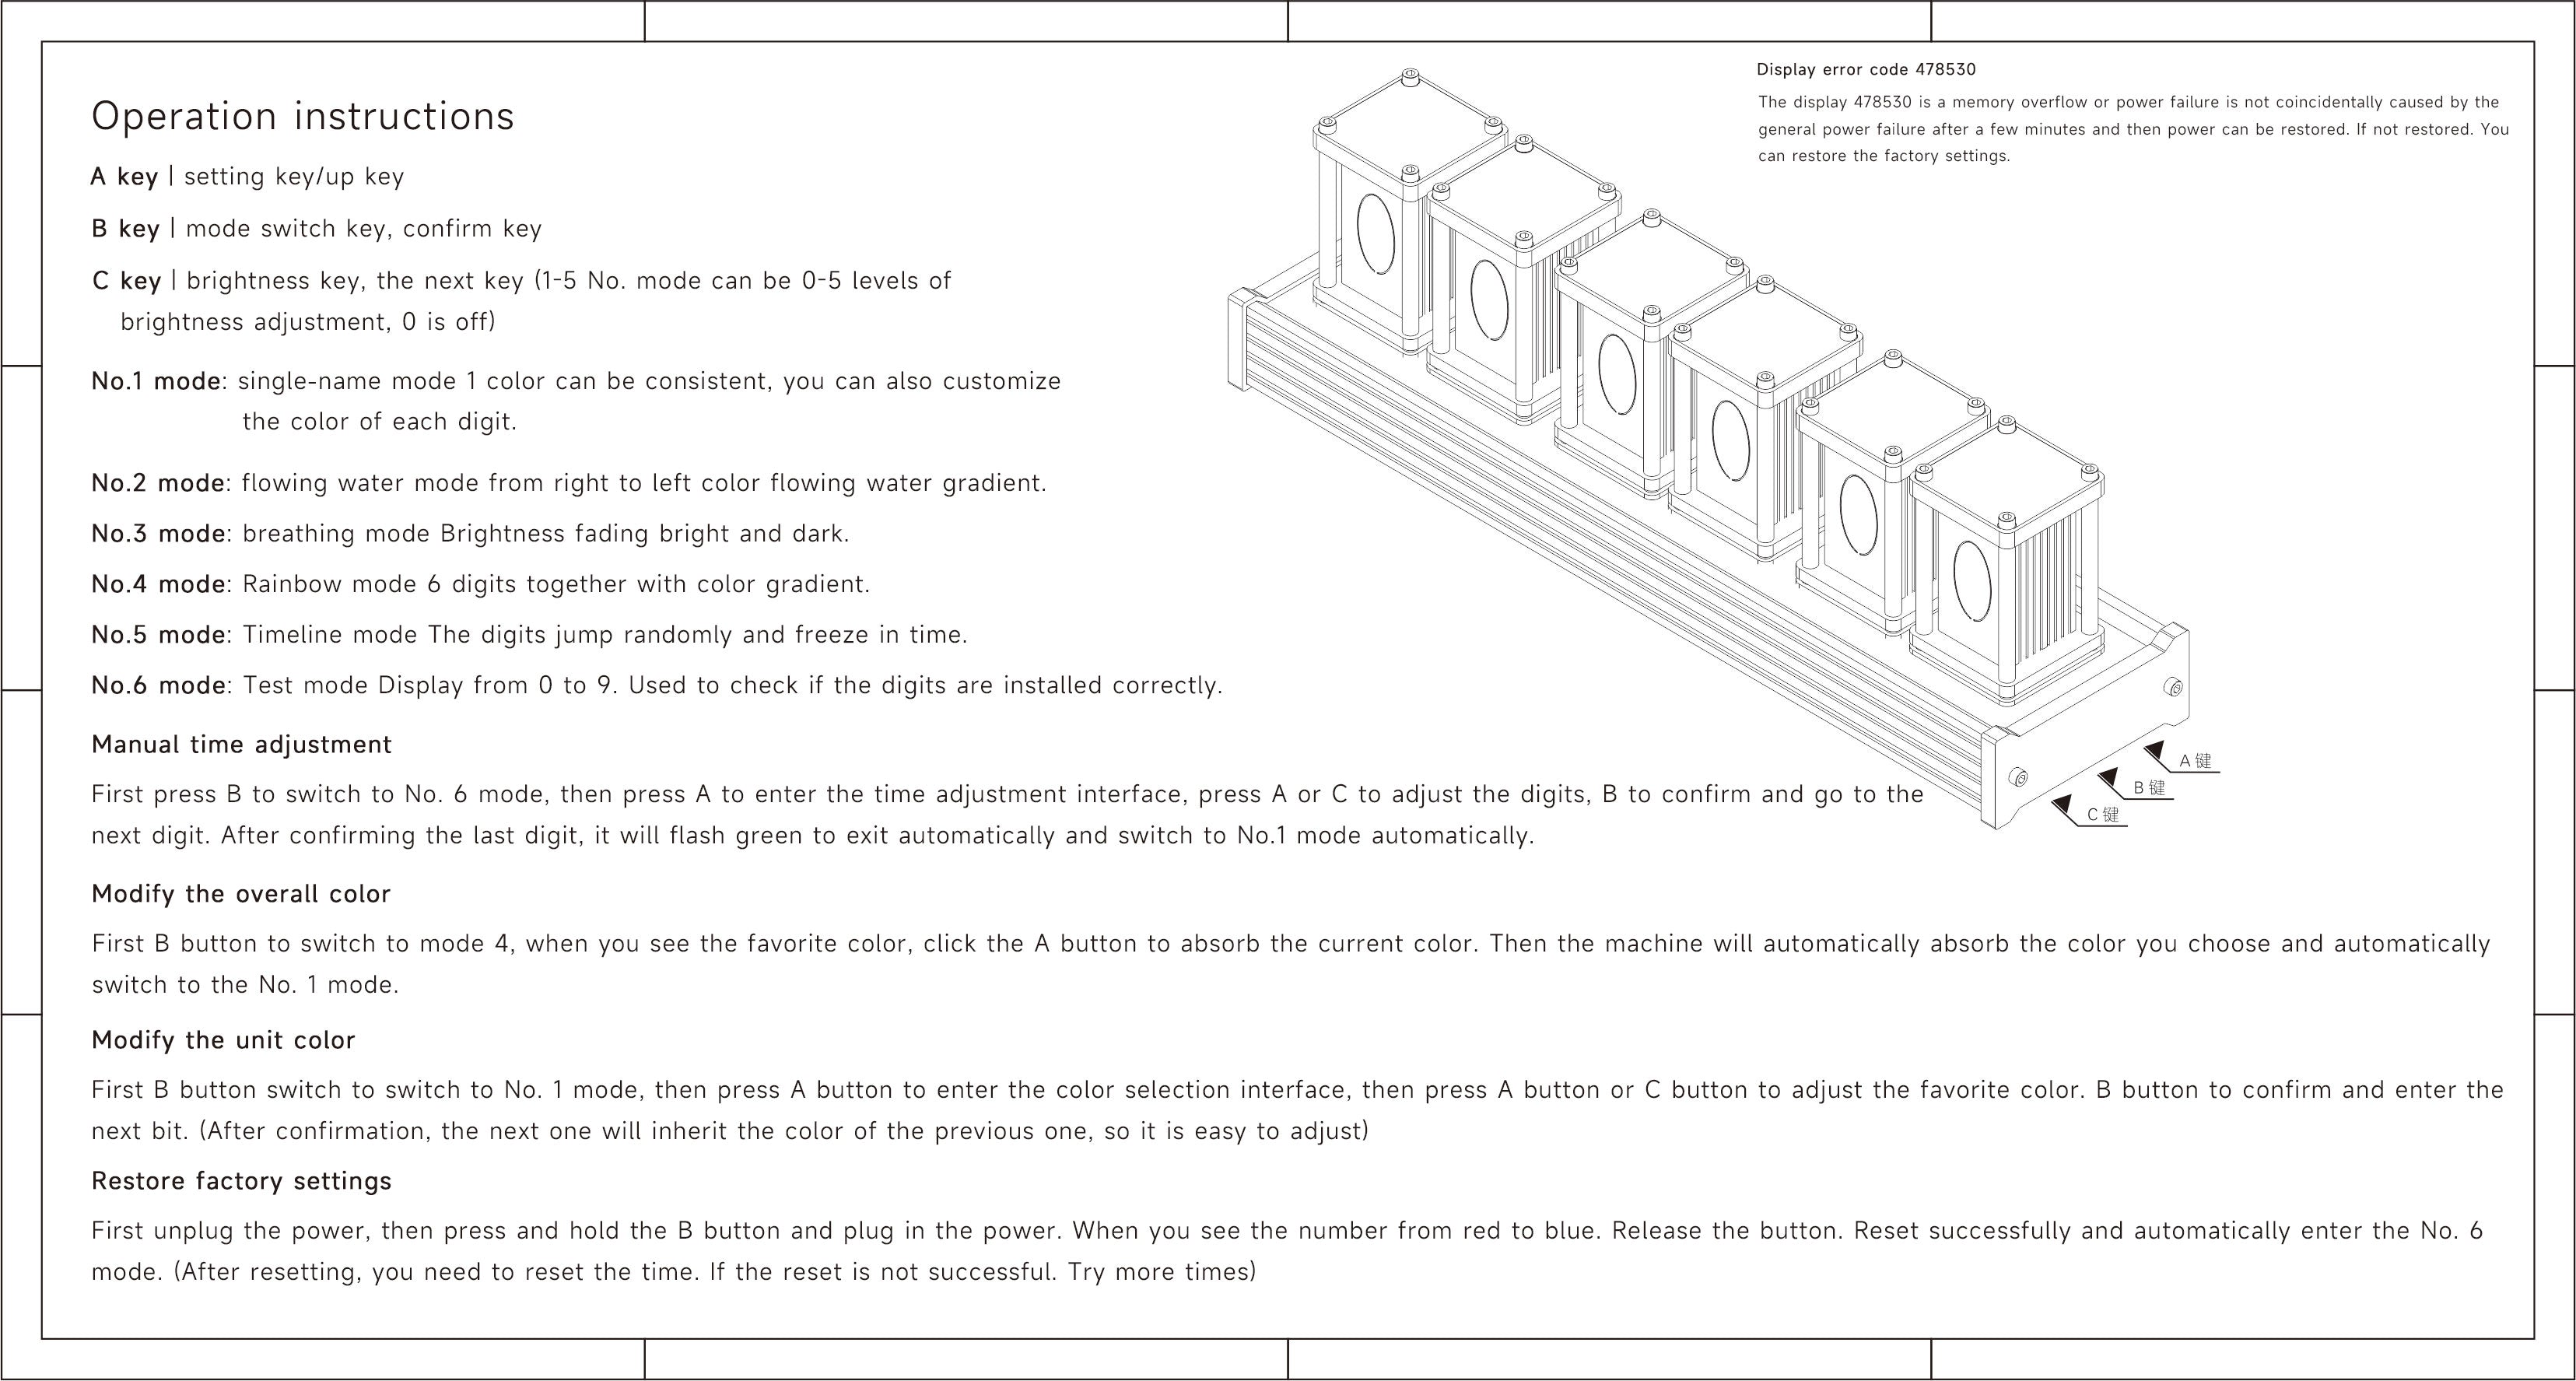
EleksTube R assembly video
Attention
- Wooden board △ Marker and light board △ Marker need to be installed correspondingly.
- There is a film on both sides of the digital sheet, which needs to be removed.
- The digital markings are arranged from 0 to 9 in the direction of the triangle △ mark, with 0 towards itself.
- The main board can only be installed on the left-hand side, and will not light up when installed on the right-hand side.
- Part B has direction, be careful not to cover the lamp bead of part C when installing.
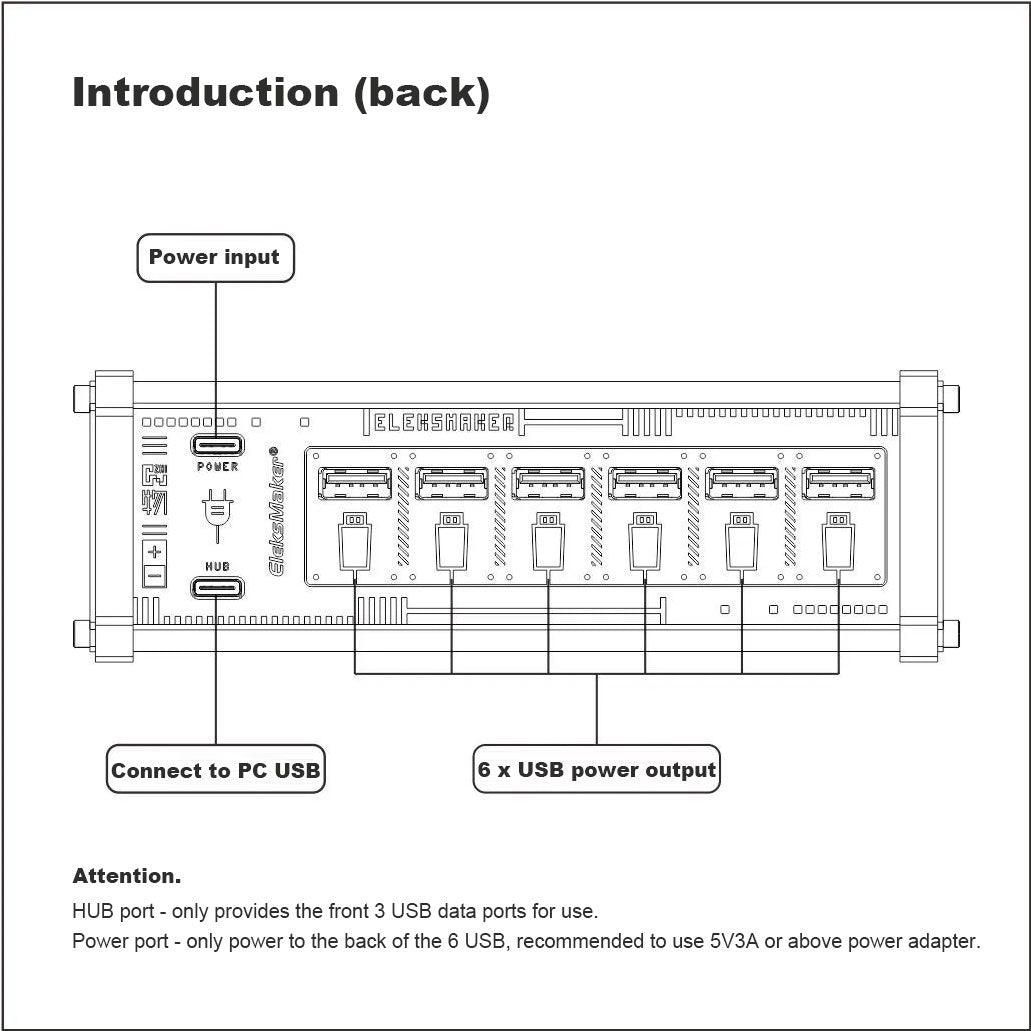
- Can only use 5v power supply head power supply, or directly connected to the computer USB port.
Wiring diagram

Assembly drawings

EleksTube R PC software
Use the computer software can set the time and set the color with one click, the software download link needs to be opened on the computer, Win8/Win10 system drive-free, plug and play. win7 system is more difficult to install the driver.
Software tutorial and client download
FAQ
Q:Assembled and plugged in the power does not light
A:Check if the triangle △ mark on the light board is on the same side as the number 9.
A:Check whether the circuit board is connected to the left.
A:Check whether the small connecting wire underneath is loose or inserted backwards.
A:Check whether the triangle △ mark is facing the opposite side, the triangle △ mark and the number 9 can not face themselves.
Q: assembled part of the light part is not light
A: Check whether the first light board in the not light is installed backwards, and whether the line underneath is inserted backwards.
A: the circuit board directly to the light board does not light, and then plugged in to see if the light board is bright, and so on, the board can be directly to each light board test to find the problematic light board or line.
Q: assembled, part of the normal display, part of the full bright
A: The same method and the previous article, the board will be directly connected to each of the light board test, to identify the problematic light board, replace it.
Q:Plugged in with the power-on animation, the animation does not light up after
A: Press the A button, adjust the brightness, not bright because the brightness is 0.
Q: Every time the power is cut off, the time will return to zero
A: The built-in button battery is not charged, replace a new battery, the battery type is CR2032, install the new battery, pay attention to the positive and negative battery do not reverse.
Q: time with a long time, the light began to randomly flicker without rules
A: may be the power supply head aging damage, you can connect the clock directly to the USB port on the computer to see if there are any abnormalities.
Q: found that the time has become faster or slower
A: First reset the time, and then patiently wait 24 hours later, and then observe the specific deviation of the clock a few minutes or seconds.
Q:How to reset
A: First unplug the power, then press and hold the middle button (B button) and do not release, then plug in the power, when you see the first place from blue to red, release the button, reset successfully.